

I was actually a little cold towards this Roden kit as I struggled with the assembly phase of Roden's latest IS-3 kit. I was also a little nervous since I had never made a wheeled model before. I started the construction of the 1/72 size bus kit Opel Blitzbus Ludewig Aero. These buses were built on the Opel Blitz chassis and were used as sightseeing buses.
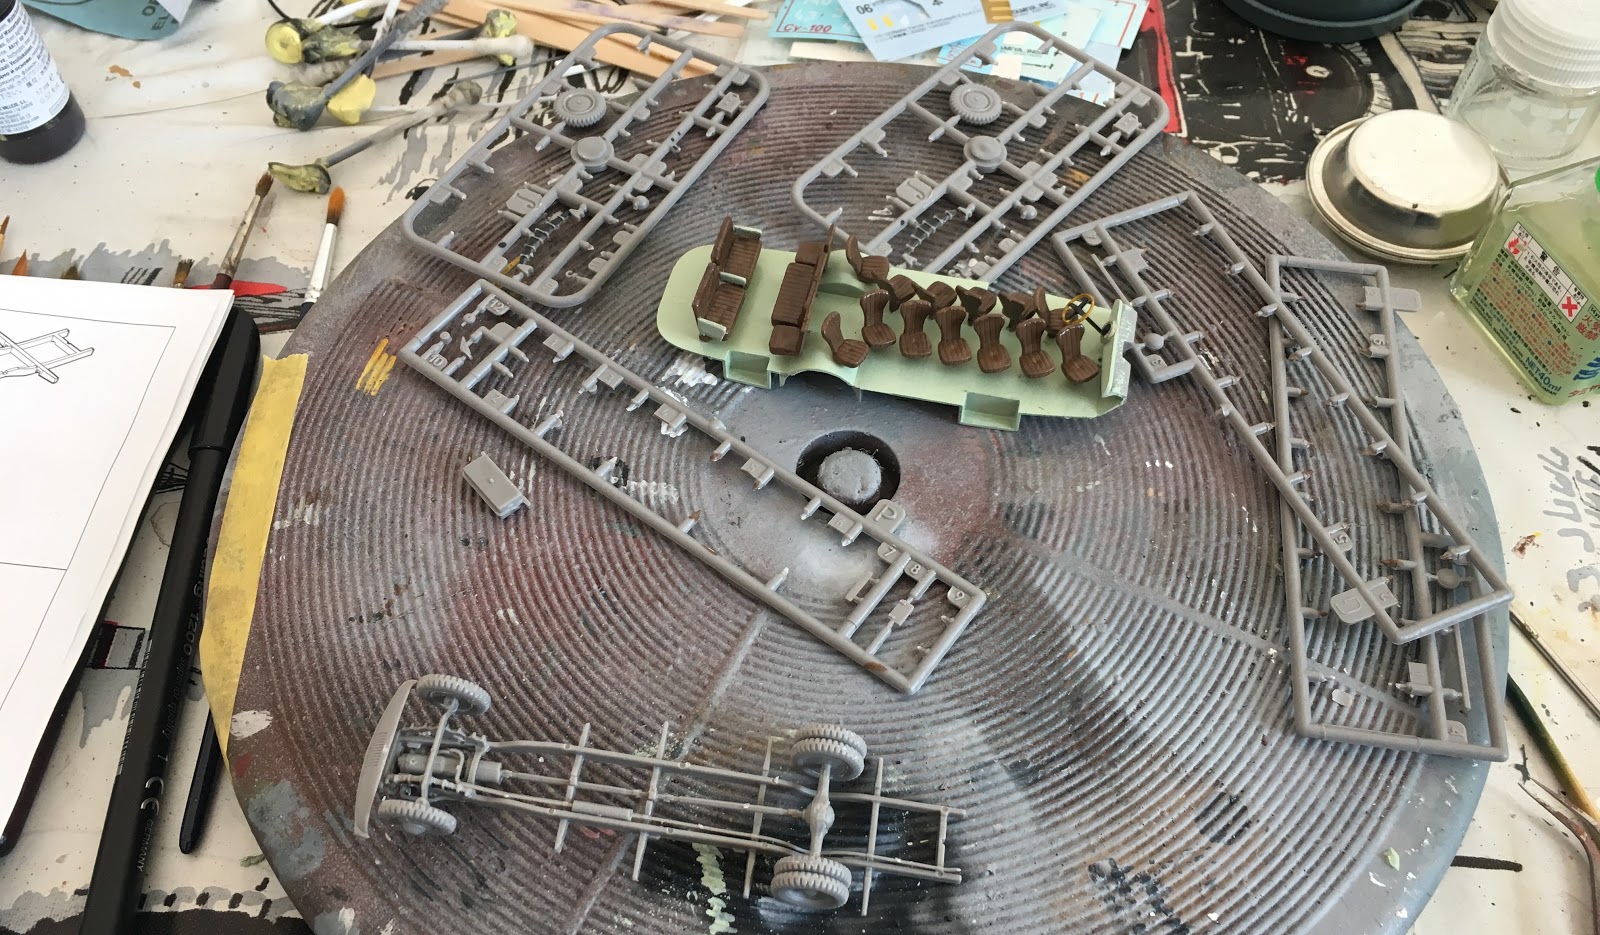
I started the construction of the bus from the inside. First of all, I painted the floor of the interior and painted the seats and placed them on the floor. Then I fixed the steering wheel and front plate in place. At the end of these processes, I am done with the interior for now.

Then I painted the bus with the white color given in the manual. But I don't like this color. In the end, I decided to turn the bus into a combat vehicle, as I was constantly making armored vehicles. After doing some research, I learned that these buses were painted gray and carried high-ranking soldiers. So I decided to paint the bus panzer gray.

I painted the bus completely in panzer gray. I made a canvas awning by stretching parafilm on it. I also painted the awning in khaki color. But in this state, the vehicle was very dark. The color had to be modulated.

I combined the chassis, interior and exterior of the bus before modulating the gray color. The parts of the car fell into place perfectly. There is a great difference in quality between this kit IS-3, which is produced by the same company. I had no problems except for the lights on the top of the bus.

I lightened the very dark panzer gray with a blue-gray color. In this way, the surface of the vehicle became like casting. In fact, the surface should have been as flat as a razor. But this was still very nice.

I dry brushed the protruding parts of the bus with white color. Dry brushing is very important as the model gains volume in this way. It is necessary to do this application in every model.

I dry brushed the canvas on the top of the bus in khaki color. Since some parts of this canvas were very sensitive, it was torn immediately and I had to patch it. I painted the headlights of the car red.

After I was done with the body, I painted the only unpainted part of the car, the wheels. I wish I had painted the wheels separately and then mounted them on the car. The joints of the wheels were so thin that they kept breaking off and I had to glue them back.

After all the painting processes were finished, I applied glossy varnish to the bus. Since I converted the bus from a civilian vehicle to a military vehicle myself, I did not have a suitable decal for this vehicle. After protecting the paint with glossy varnish, I also had to find a decal for the bus.

I arranged something out of other kits for the decals. I had German decals from old kits. I used them in this model. On the sides of the bus, I added company markings from the tanks I had modeled before. When I placed the numbers on the sides, the decal work was also done.

After the decals dried, I applied glossy varnish again on the model to protect the decals. It is necessary to protect the model with varnish before completing one stage and moving on to the next. Otherwise, the underlying paint layer is damaged. Again, if you do not dry the varnish before proceeding to the next step, the varnish will also peel off. It is necessary to be careful against such dangers.

When the decals were finished, it was time for the oil painting stage, which is my favorite. First of all, I applied a filter on the outer surface of the bus in white, blue and brown colors. In this way, both the shine has gone and the ground has become ready for the weathering we will do later.

After the filter, I used oil paints to create contrast between the layers of the bus. It is important to wait for the underlying filter layer to dry completely before doing this. Otherwise, you will completely delete the filter when painting with oil.

The bus had a body made by combining different plates. I tried to achieve contrast by painting each plate in a different color. Unfortunately, I noticed from the pictures that there were oil paint residues left in some places.

When the oil painting phase was finished, it was time to apply washes the bus. Since I didn't want to darken the color too much, I tried to do a light wash with black color.

Unfortunately, I could not reach my goal and the color darkened compared to its original state. I wanted to remove the wash solution using turpentine. But still it was not possible to lighten the darkened color.

After the washing phase was over, I covered the vehicle with matte varnish. Since the matte varnish creates a rough surface, it makes the weathering process very easy. But it is very important to wait for it to completely dry and harden. Otherwise, turpentine or white spirit may damage the varnish layer.

The windows of the bus looked very bright. I wanted to age the windows by dusting them. But I was worried that if I dusted too much, it would lose its transparency. I applied the raindrop solution that I had diluted too much on the windows. When I got the blur I wanted, I ended the process.

In fact, the side plates of the bus were ideal for streamlining. But I didn't want to make too much streaks in this vehicle. I made dust and mud on the chassis of the bus. I also dusted the fender part behind the wheels.

I dusted the wheels to look realistic. I did some puddle of dust between the rims. I wiped the parts of the wheels that contacted the ground with my hand to keep them shiny. This way I got a more realistic look.

The tarpaulin on the vehicle started to tear as soon as I touched it with a brush for weathering. I took parafilm over the torn areas and painted again. But this tearing problem recurred often.

I've had constant problems with the front wheel. The left front wheel broke off frequently. As I glued the broken wheel, the plastic started to melt. I solved this problem by adding extra part in between. Those who want to make this kit better pay attention to the front wheels.

I used washing liquids to create a dust and mud effect on the skirts of the vehicle's body. I applied these liquids to some places with a brush tip and to some places with a sponge. I applied it lightly as I didn't want it to be too powdery.

After dusting the edges, I tried softening the edges with washing liquids. Since I wanted it not to be too dusty in general, I reduced the excess parts by using white spirit.

After all the weathering stages of the bus were finished, I made a final check. When I saw that the decals were very erased, I went over the decals with turpentine and tried to reveal them.

Part of the tarpaulin on the bus was torn again. I drew parafilm and painted the torn part again, but it still tore again. I decided to leave it as it is.

I've never made a model of a wheeled vehicle before. This was the first time and it was really beautiful and fun to make. While this kit has a few issues, overall it's a nice and easy combination. I would recommend it if you are considering buying it.

After a long period of construction, I finished the bus and put it on display. While Roden's tanks had problems in the construction phase, such errors were rare in this bus. I put the model on display, planning to buy another bus in the future.


